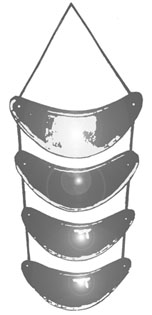
| Making Gorgets by Clayton C. Carroll (May 1991) in 19th Century Seminole Men`s Clothing
|

| Making Gorgets by Clayton C. Carroll (May 1991) in 19th Century Seminole Men`s Clothing
|
|
| |
|
|
1 roll duct tape 1 pair flat-tip pliers 1 ballpoint pen 1 pair scissors 1 hammer |
Step By Step Construction:
 |
Step 1: Trace or make a photocopy of one of the gorget patterns included here. Step 2: Cut each of the patterns out of the photocopy and trace them DIRECTLY onto a sheet of German sllver with a permanent marker. Do not throw the paper patterns away; they will be needed later |
 |
Step 3: Use a pair of handheld tin snips to cut out the traced shapes. Compare the paper patterns with the cut out gorgets. If they don't match, use your own judgement on removing excess. But at this stage, it does NOT have to be perfect. |
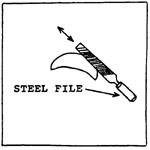 |
Step 4 The edges of the cut metal will be sharp. CAREFULLY use a file to remove all the sharp edges. |
 |
Step 5: Lay each of the gorgets out on a piece of scrap wood. Place the paper patterns on top of them. Use a piece of tape to keep the pattern from shifting around. Hammer a small nail through the center of the two circles marked A and B on the paper pattern. Remove the nail and the paper pattern. |
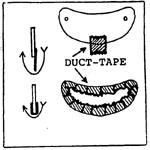 |
Step 6: Cover the outer edges of the gorgets with duct tape, which will keep the metal from getting scratched while it's being shaped. |
 |
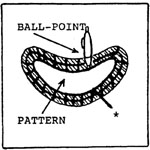
Step 7: You will be marking the first of two guidelines onto the duct tape, as follows. (For convenience, the guidelines are on the paper patterns.) Step 8: Cut off the outer sections of the paper patterns, and center the remainder of the pattern on the gorgets. |
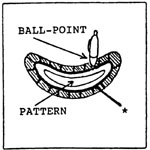 |
Step 9: Use a ballpoint pen to trace the outline of the trimmed paper patterns onto the duct tape. Make the lines very dark. |

 |
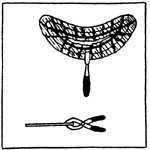
Step 10: Cut off the next part of the paper patterns marked "inner section," and repeat as above. Make the ballpoint lines DARK. |
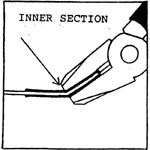 |
Step 11: Line the edge of a pair of pliers up against the innermost traced line. Make an approximately 95 degree bend upward on the gorges's edge. Repeat all the way around making sure to realign the pliers each time. You will be bending as if to make a "V", but the proper result will be a half curve. |

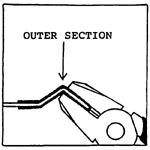 |
Step 12: Place the edge of the pliers against the outermost traced line. Bend the outer end downward at about a 45 degree angle, again aiming for a "V" but achieving a half curve. Repeat until completed. Step 13: Remove the duct tape. Remove any new sharp edges with a file. |
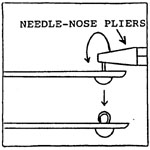 |
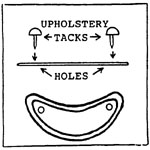
Step 14: Place a silver upholstery tack in each of the gorget's holes. Use needlenose pliers to bend the nail part of the tack into a loop big enough to allow a leather thong or a ribbon to slip through. Repeat until all the gorgets' holes have an upholstery tack in then. (You might also use metal shoe buttons. - Ed.) |
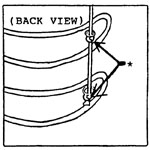 |
Step 15: The thong or ribbon should be 2-1/2 to 3 feet long. Test by pulling before using to make sure it won't break. Lace the thong through the tacks, adjust for spacing, and tie knots to hold the gorgets in place. |
REFERENCES:
Goggin, John M.
1940 "Silver Work of the Florida Seminole." E1 Palacio 47:25--32.
MacCauley, Clay
1887 "The Seminole Indians of Florida." Fifth Annual Report of the Bureau of Ethnology, Washington DC.
Sturtevant, William C.
1967 "Seminole Men's Clothing" in "Essays on the Verbal and Visual Arts; Proceeds of the 1966 Annual Spring Meeting of the American Ethnological Society," ed. June Helm, pp. 10-74. Seattle: American Ethnological Society; Distributed by the University of Washington Press. Reprinted in "The Seminole Source Book," ed. William C. Sturtevant, 1987.
Return to History and Materials for Gorgets
Return to Seminole Silver Work
Introduction to Seminole Accessories
Complete Index to Articles in 19th Century Seminole Men's Clothing

|
Text and Graphics
© 1994 - Tara Prindle unless otherwise cited. |