 |
The Zig Zag Technique contributed by Nancy Fonicello |
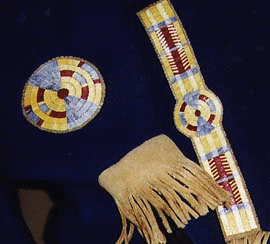
| Quill Ebroidery with patterns created by Nancy using various colored quills and the Zig-Zag Technique |
 |
The Zig Zag Technique contributed by Nancy Fonicello |
| Quill Ebroidery with patterns created by Nancy using various colored quills and the Zig-Zag Technique |
The zigzag technique is probably the simplest quillwork style to learn,
and is yet very versatile. It was widely used by the Native peoples
of the Eastern Woodlands to decorate everything from neck knife
sheaths to moccasins. Since we are just beginning, it would be
well to start out with a discussion of tools and materials, then
we will proceed to the actual instruction.
|
Tools and Materials |
|
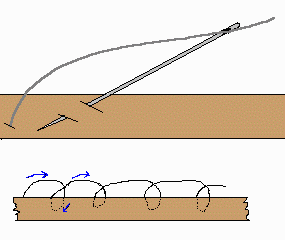
The Back Stitch
The most widely used stitch for embroidered
quillwork is the back stitch. It is a very simple method of sewing
in which the needle enters the leather from right to left as the
work progresses from left to right. This stitch is used for both
upper and lower threads in zigzag stitch, simple band technique,
and all the multiquill plait stitches. See the example below.
Note also that the needle and thread do not go all the way through
the leather, as we mentioned above. Just a little tiny stitch
is sufficient: |
|
Sewing Techniques
Okay!
Now we're down to the nuts and bolts. You have the pointy ends
of your quills snipped off and have them soaking in a saucer of
water. Draw two lines on the leather about 3/8 inch apart
where you want your quillwork
to go. The actual distance between the lines will depend on the
size of quill and desired effect, but 1/4 to 3/8" apart is
a good standard.
Variations on the ZigZag Technique
Many variations in this style can be achieved by changing where you
splice in your new color quill. Changing your splice from the
bottom row to the top row effectively changes the direction of
your new color. Item A below is a bottom row color splice as
discussed above. Note how it gives you a nice straight vertical
line. The quillwork at B shows a top row color splice. Suddenly
you get diagonals in your work, just with a simple splice! At
C, another quill of a different color has been added directly
over top of the old quill and the two quills worked together as
one, giving a two color sawtooth effect. Do two rows of these
opposite one another, and you have diamonds. The varieties are
infinite. Experiment!
Now you have learned the basic zigzag
technique with a few variations. Come back soon to find more
techniques! More will be added as time goes by, so stay tuned!
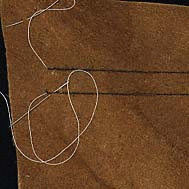
Knot the thread on top of the work
by taking a few close stitches and running the thread back through
them. You may also put knots underneath the work, but they will
look lonely down there as you won't see any other stitches from
the underside. Bring the threads up to the beginning of your
line where you want your first quill to be. Do this for both
top and bottom lines. The illustration shows the bottom thread
taking a back stitch for the first quill. Note that the needle
ALWAYS exits the leather on the outside of the lines (away from
the quills). Otherwise you have a little loop under the quill
that keeps you from hiding your threads well:
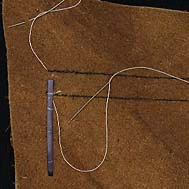
Take a quill out of the
water and flatten it by running it between your thumbnail and
your index finger. You can also try running a spoon across it
on a flat surface. Whatever method you use, make sure the quill
is flat! You can't have good work later with a puffed up or wrinkly
quill now! Insert one end of the quill under the bottom thread,
and pull the stitch snug.

Flip the quill up and take a stitch over it as you did below, making
sure the needle comes out on the side away from where the quillwork
will be. Pull this stitch snug, and you've just mastered the
zigzag technique!
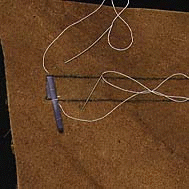
Now bend the quill back down over the stitch and sew it down again
at the bottom. Make sure that your stitches stay on your drawn
lines. Straight lines are essential here. Continue on in this
manner until you come to the end of your quill at the bottom line.
This is where you splice in another quill. Sew down the quill,
pull the stitch snug and make a fold in the quill as if you were
to continue on.

Pull on the quill slightly
so that your last stitch loosens up a little. Flatten another
quill and insert it under the first one. Trim the old quill close
and continue on as before. In the illustration, and yellow quill
has been inserted under the blue one.

Continue
along adding quills as you go. Occasionally stop and run your
tablespoon across the top of your work, adding a little pressure
to help flatten it. When you get to the end of your row, simple
tuck the last little quill end under the work. The dental pick
is most useful here.

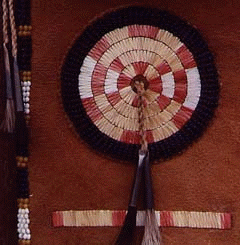
using the Zig-Zag Technique
Return to NativeTech's Main Porcupine Quillwork Menu

|
Text and Graphics
© 1994 - Tara Prindle unless otherwise cited. |